If you are wiring a strain gauge on a 3.3 V board, the INA333 can save you a lot of grief with its tiny offset and low noise.
You will also see why AD620 modules from Teyleten Robot and AITRIP remain popular, since they offer adjustable gain and fit cleanly into lab builds.
When you need a simple through-hole part for older gear, the UA741CP still earns its keep. The best choice depends on a few details that matter more than you might expect.
| NUX Mighty Lite BT MKII Guitar Amp | 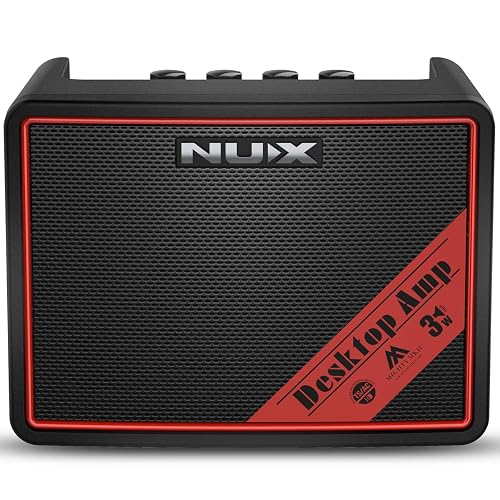 | Practice Amp | Amplifier Type: Digital modeling amp | Channel Count: 1 channel | Power Supply: Battery powered | VIEW LATEST PRICE | Read Our Analysis |
| INA333 Precision Instrumentation Amplifier Module for Arduino | 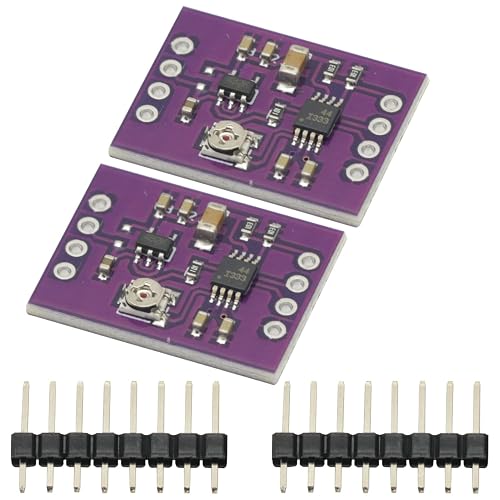 | Precision Module | Amplifier Type: Precision instrumentation amp | Channel Count: 3 channels | Power Supply: 1.8V-5.5V | VIEW LATEST PRICE | Read Our Analysis |
| Texas Instruments UA741CP Op Amp IC 8DIP 6-Pack | 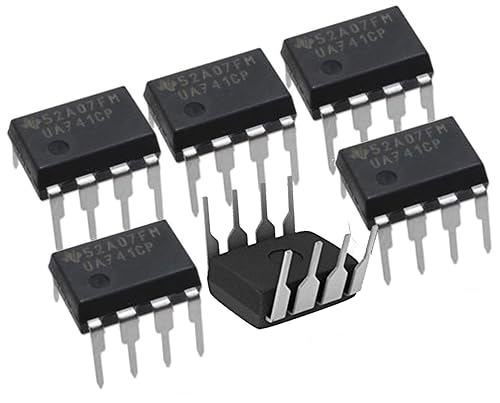 | Classic Op Amp | Amplifier Type: General-purpose op amp | Channel Count: 1 channel | Power Supply: 7V-36V | VIEW LATEST PRICE | Read Our Analysis |
| Teyleten Robot AD620 Voltage Amplifier Module (3PCS) |  | High-Gain Pick | Amplifier Type: AD620 instrumentation amp | Channel Count: 1 channel | Power Supply: 3V-12V | VIEW LATEST PRICE | Read Our Analysis |
| AITRIP AD620 Voltage Amplifier Module (3-Pack) | 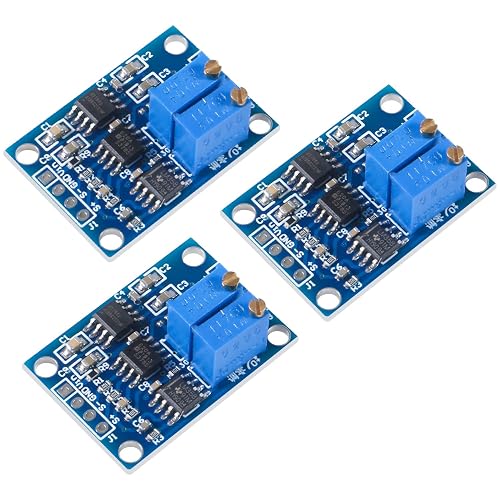 | Adjustable Gain | Amplifier Type: AD620 instrumentation amp | Channel Count: 1 channel | Power Supply: 3V-12V | VIEW LATEST PRICE | Read Our Analysis |
More Details on Our Top Picks
NUX Mighty Lite BT MKII Guitar Amp
The NUX Mighty Lite BT MKII Guitar Amp is a smart choice if you want a tiny amp that still feels full of life, because it delivers real practice power without tying you to one room. It provides 3W output, battery operation, and a backpack-friendly body for home use, outdoor playing, or quick street sets. You can shape clean, overdrive, and distortion tones with TSAC-HD modeling and seven active presets. The built-in drum machine, Bluetooth, USB-C audio, IR loading, and app control make practice easy. With simple knobs, the unit remains friendly and flexible.
- Amplifier Type:Digital modeling amp
- Channel Count:1 channel
- Power Supply:Battery powered
- Gain:3 sound modes
- Package Quantity:1 unit
- Mounting Style:Desktop
- Additional Feature:Bluetooth wireless connection
- Additional Feature:Built-in drum machine
- Additional Feature:Loopback livestream support
INA333 Precision Instrumentation Amplifier Module for Arduino
If you need a small, reliable way to boost tiny sensor signals for Arduino projects, the INA333 Precision Instrumentation Amplifier Module is a smart fit. You get a low power, three channel board for DIY builds and electronic sensors, with included feedback, and two pieces in the package. It works from 1.8 V to 5.5 V, so you can match many setups with ease. Its 25 µV max offset, 0.1 µV/°C drift, and 50 nV/√Hz noise help you read weak signals cleanly. GODIYMODULES makes the Mod-INA333-002 module.
- Amplifier Type:Precision instrumentation amp
- Channel Count:3 channels
- Power Supply:1.8V-5.5V
- Gain:G ≥ 100
- Package Quantity:2pcs
- Mounting Style:Module board
- Additional Feature:Ultra-low offset voltage
- Additional Feature:Ultra-low drift
- Additional Feature:Low-noise performance
Texas Instruments UA741CP Op Amp IC 8DIP 6-Pack
Texas Instruments UA741CP provides a classic single-channel op amp in a sturdy 8DIP package, making it a good choice when you need a dependable general-purpose amplifier for through-hole builds, lab projects, or repair work. Each pack contains six authentic TI parts, each with 1 MHz gain bandwidth, 0.5 V/µs slew rate, and a 7 V to 36 V supply range. It draws 1.7 mA and is suitable for warm, practical setups. Because the design is simple and proven, you can wire it quickly, test with confidence, and keep your bench calm even when the signal varies.
- Amplifier Type:General-purpose op amp
- Channel Count:1 channel
- Power Supply:7V-36V
- Gain:1 MHz GBW
- Package Quantity:6-pack
- Mounting Style:Through-hole
- Additional Feature:1 MHz gain-bandwidth
- Additional Feature:0.5 V/µs slew
- Additional Feature:Through-hole DIP package
Teyleten Robot AD620 Voltage Amplifier Module (3PCS)
Teyleten Robot’s AD620 Voltage Amplifier Module provides a compact, ready-to-use way to amplify very small signals to a usable level, making it well suited for hobbyists, repair technicians, and lab users who need clean amplification without extra complexity. This pack includes three modules, each based on the AD620 for precise AC and DC gain from 1.5 to 1000. The modules operate from DC 3 to 12 V, feature low offset and effective noise filtering, and support zero trim. The small 32 x 22 mm board also delivers 100 dB CMRR, keeping measurements stable.
- Amplifier Type:AD620 instrumentation amp
- Channel Count:1 channel
- Power Supply:3V-12V
- Gain:1.5-1000 adjustable
- Package Quantity:3pcs
- Mounting Style:Through-hole
- Additional Feature:100 dB CMRR
- Additional Feature:Negative voltage output
- Additional Feature:Zero adjustment control
AITRIP AD620 Voltage Amplifier Module (3-Pack)
The AITRIP AD620 Voltage Amplifier Module is ideal for lifting very small signals without adding excessive noise. The pack includes three compact boards, each using an AD620 instrumentation amplifier to provide clean gain from 1.5 to 10,000. It operates from 3 V to 12 V DC and accepts inputs from microvolts up to 300 mV, supporting both AC and DC signals. A trim for zero adjustment improves accuracy, while low offset and noise filtering keep readings stable. Measuring 32 by 22 mm, it fits into tight builds and offers performance superior to the LM358.
- Amplifier Type:AD620 instrumentation amp
- Channel Count:1 channel
- Power Supply:3V-12V
- Gain:1.5-10000 adjustable
- Package Quantity:3-pack
- Mounting Style:Surface mount
- Additional Feature:Adjustable zero offset
- Additional Feature:Noise filtering capability
- Additional Feature:High-frequency signal handling
Factors to Consider When Choosing Instrumentation Amplifiers
When choosing an instrumentation amplifier, match the gain range to your signal so you do not have to compensate for a weak or oversized output. Also check input offset voltage, common-mode rejection, supply voltage range, and noise performance, because each of these parameters affects the cleanliness and accuracy of your measurement. Selecting these specifications carefully reduces guesswork later and yields a setup that performs as expected.
Gain Range Requirements
A smart gain choice makes your instrumentation amplifier easier to use. Match the gain range to your input amplitude: low-level sensors may only need a gain of 1.5 to 100, while very small signals can require gains of 1000 or 10000. If your signal amplitude changes, choose adjustable gain so you can maintain sensitivity without clipping the output. For microvolt and millivolt inputs, select a device designed for about 100 µV to 300 mV, where stable gain is most important. Avoid excessive gain unless it is truly required, because higher gain increases noise and aggravates offset issues. If accuracy at high gain matters, choose an amplifier with low offset voltage and low drift so readings remain stable over time and temperature.
Input Offset Voltage
Precision slips quickly if you ignore input offset voltage, because even a tiny built-in error can nudge your measurement off target. Choose the smallest offset you can get, since microvolt-level error matters when a sensor provides only 100 µV to a few millivolts. In high-gain setups that small mismatch grows with the signal and can reduce usable range. Check the room-temperature specification first, then examine drift over temperature in µV/°C, which shows how much the zero point may wander as conditions change. With a low-offset instrumentation amplifier you keep the baseline steadier, reduce calibration work, and measure weak AC or DC signals with greater confidence. Your measurements become calmer, cleaner, and less fussy.
Common-Mode Rejection
Now that you have kept input offset voltage under control, the next thing to watch is common-mode rejection, because even a well-trimmed amplifier can still be fooled by the same unwanted voltage appearing on both input lines. You need a high CMRR when your wanted signal sits in the microvolt or millivolt range and rides on larger noise. A good part often reaches 100 dB or more, which reduces shared noise by about 100,000 times in voltage. Still, do not trust a single number alone. Check performance across your real bandwidth, because rejection often drops as frequency rises. Also choose parts with tight internal resistor matching, and keep your layout clean. Small imbalance can turn harmless noise into an annoying error quickly.
Supply Voltage Range
How do you know if an instrumentation amplifier will fit your power source? First, match its supply range to what you can actually provide. Many devices run on 1.8 V to 5.5 V, while others require 3 V to 12 V or even 7 V to 36 V. Check the minimum and maximum ratings before you buy. Also confirm whether the part supports single-supply or dual-supply use, since that changes how you wire it. If you are building a battery-powered tool, low-voltage parts can be advantageous. If you need more signal headroom, a higher supply voltage often gives you more output swing before clipping. A wider acceptable range helps, but only within the device safe limits. Choose carefully and your circuit will perform better.
Noise Performance
When you choose an instrumentation amplifier, noise can make or break your measurement, especially if your sensor only gives you tiny microvolt or millivolt signals. Aim for the lowest input-referred noise available, because that keeps weak signals above the amp’s own noise floor. Check noise density in nV/√Hz so you can compare parts fairly; for example, 50 nV/√Hz is cleaner than a higher value. Also watch low-frequency offset and drift, since a 25 µV error can look huge at high gain. Next, consider bandwidth, because a wider band pulls in more noise. For stable precision, combine low noise with low offset and low drift so your readings remain trustworthy over time.
Package And Mounting
A good package choice can save you a lot of frustration, because the way an instrumentation amplifier is built affects how easily you can fit it into your project. Match the package to your assembly method. Use through-hole parts when you want easy breadboard testing or hand soldering, and choose surface-mount styles when space matters on a compact PCB. Next, check whether you need a bare IC, a board-mounted module, or a boxed unit; each one changes how much support work you will do. Also look at the channel count, since single-channel and multi-channel packages can change your layout quickly. Finally, verify size, pin spacing, and mounting details, such as DIP footprints or holes, so the part fits into your enclosure or fixture without a fuss.
Application Compatibility
To get the best results from an instrumentation amplifier, match it to your exact signal and system needs. Start by checking the input type and signal range, because tiny sensor outputs, even from 100 µV to 300 mV, can disappear fast if the device is not a fit. Next, confirm the supply voltage so your amplifier runs safely, whether your design uses 1.8 V to 5.5 V or a wider rail such as 7 V to 36 V. Then look at channel count if you are handling more than one input. Also make sure it supports the required polarity, AC or DC behavior, and output swing your circuit expects. Finally, pick a gain range that stays stable for your measurement task.
Frequently Asked Questions
How Do Instrumentation Amplifiers Reduce Common-Mode Noise?
You reduce common-mode noise by using an instrumentation amplifier that subtracts equal signals on both inputs, so only the differential voltage remains. Its high common-mode rejection allows more accurate measurement of small signals.
What Bandwidth Trade-Offs Matter in High-Precision Measurements?
In high-precision measurements, you trade bandwidth for lower noise, better settling, and higher gain accuracy. Wider bandwidth can reveal transients, but it often increases errors. Test the theory, then choose the narrowest bandwidth that still fits your signal.
Can Instrumentation Amplifiers Handle Low-Power Battery Systems?
Yes, you can use instrumentation amplifiers in low-power battery systems if you choose low-quiescent-current parts, limit gain and bandwidth, and power them down when idle. They will boost tiny signals without draining your battery too quickly.
How Does Input Bias Current Affect Sensor Accuracy?
Input bias current can skew sensor readings by creating voltage drops across source resistance, causing offset error and drift. Reduce its effect by using low-bias amplifiers, matching impedances, or adding a buffer.
When Should a Differential Amplifier Replace an Instrumentation Amplifier?
Replace an instrumentation amplifier with a differential amplifier when you need lower cost, simpler circuitry, and only modest gain precision. If the signal source impedance is balanced and common mode rejection is not critical, you can reduce parts and complexity.