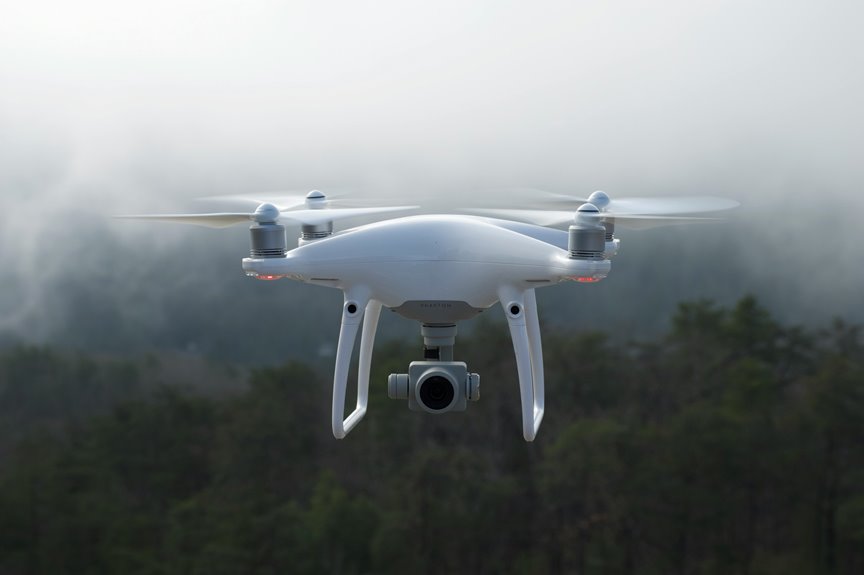

Steady drone footage comes from good planning, smooth control, and a properly balanced gimbal. Calm weather, slower movements, and clean camera settings all help reduce shake in the air. A few simple habits before takeoff can make your video look far more polished. With the right setup and a relaxed flying style, capturing stable aerial shots gets much easier.
What Causes Shaky Drone Footage?
When your drone footage looks shaky, the cause usually starts with movement that the camera can’t fully correct in real time. You’re not doing everything wrong, and you’re definitely not alone. Small vibration sources often build up fast, especially from propellers, motors, sudden wind, or a rough takeoff.
Then your flying style adds to it. Quick turns, abrupt stops, and control input errors push the camera harder than the stabilizing system can handle. Whenever your drone tilts, yaws, or bounces during flight, the footage shows it immediately. That’s why smooth motion matters so much.
Some shake also comes from the environment. Gusts, indoor air currents, and uneven launch spots can upset balance before you even settle into a shot.
Once you recognize these triggers, you start flying with more confidence and calm.
Choose a Drone With Better Stability Features
A lot of shaky footage starts in the air, but the drone you choose can make your job much easier from the initial flight. Whenever you want steadier results, look for a 3-axis gimbal instead of a basic 1-axis or 2-axis setup. It keeps pitch, roll, and yaw under control, so your footage feels polished and confidence-building.
Next, check gimbal motor quality, because stronger motors react faster whenever your drone shifts. Pair that with vibration damping, shock absorption mounts, and a reliable IMU for smoother correction.
During a drone sensor comparison, pay attention to GPS position hold, vision sensors, and built-in EIS or OIS. These features help your drone stay locked in and make you feel like part of the crew that captures clean, cinematic footage every time.
Plan Drone Shots Before Takeoff
How do you get smoother footage before the props even spin? You plan like someone who belongs in the sky. Before launch, imagine the story you want viewers to feel, then shape your shot composition around it. Choose your subject, decide your height, and mark where each movement begins and ends.
Next, use flight route mapping to build a clean path with gentle turns and steady speed. That helps you avoid rushed corrections that can shake footage. Check the light, observe obstacles, and time your move for calmer air.
Should you’re flying with friends or clients nearby, a clear plan also builds confidence and trust. You won’t feel like you’re guessing up there. You’ll feel prepared, connected, and in control, which often leads to footage that looks calm, polished, and shared with dignity.
Balance Your Drone Gimbal Before Flight
Often, smoother footage starts with a balanced gimbal, not a fancier camera. Before you lift off, check that the camera sits level and moves freely. That simple pre flight balance reduces motor strain, cuts small shakes, and helps your drone feel ready with you.
Then run gimbal calibration so the system reads its center correctly and responds smoothly in the air.
- You protect your gear and fly with more confidence.
- You give the motors less work, which means calmer movement.
- You catch tiny tilts before they spoil a great moment.
- You join skilled pilots who trust careful habits.
- You start each flight feeling prepared, steady, and capable.
If your drone uses a 3-axis gimbal, balanced setup matters even more, especially whenever wind tries to push your shot off level.
Set Your Drone Camera for Smoother Video
After you balance the gimbal, you need to fine-tune your camera settings so your footage stays smooth in the air.
You’ll get better results whenever you match the right gimbal and stabilization options with a frame rate, shutter setting, and resolution that fit your shot.
That small setup work pays off fast, especially whenever you want clean, steady video that feels calm and cinematic.
Gimbal And Stabilization Settings
If you want smoother video, your initial job is to set up the gimbal and stabilization tools so the camera can fight movement before it ruins the shot. Start with gimbal calibration, then choose stabilization modes that match your flight. A 3-axis gimbal gives you the strongest control in wind and turns, while EIS and Horizon Steady help clean up smaller shakes.
- You feel more confident whenever the horizon stays level.
- You trust your drone more while motion looks calm.
- You join creators who plan smooth, cinematic moves.
- You protect each shot through checking settings ahead of time.
- You give your audience a steadier, more welcoming view.
Next, pair those settings with Cine or Tripod Mode. Slow responses help the gimbal work better. Should available, turn on GPS hold or vision sensors for extra steadiness indoors.
Frame Rate And Shutter
Because smooth motion depends on more than the gimbal alone, your frame rate and shutter settings play a huge part in how stable your drone footage feels. When you match them well, your clips look natural, calm, and cinematic, like they belong with the work skilled pilots create every day.
Start by choosing a frame rate that fits the movement. If you want smoother action or slow motion, 60fps helps. For a more classic look, 24fps works well. Then set shutter speed so it supports realistic motion blur instead of harsh, jittery detail. A common guide is to keep shutter speed at about double your frame rate. That means 1/50 for 24fps or 1/120 for 60fps.
When you dial this in, your footage feels more polished, steady, and confidently yours in every flight.
Resolution And Video Profile
The next setting that shapes how stable your footage feels is resolution and video profile, and this is where many pilots make the camera work harder than it needs to. High resolution settings can look sharp, but they also magnify tiny shakes and demand more from stabilization.
So, choose settings that help your drone breathe and keep your footage feeling calm and connected:
- Use 4K only whenever you truly need extra detail
- Drop to 2.7K or 1080p for smoother movement
- Pick flatter video profile choices only provided that you’ll color grade later
- Use standard profiles whenever you want cleaner results fast
- Match resolution settings to your editing skills and storage space
Whenever you simplify these choices, your drone responds better, your footage feels steadier, and you stay part of the group that captures video people love to watch.
Fly Slower for More Stable Drone Footage
Should you want steadier drone footage, start with flying slower. As you use slow flight, your drone has more time to respond, and your camera records movement that feels calm, clean, and cinematic. You stay in control, and that confidence shows in every clip.
That slower pace also helps you make gradual turns instead of sharp changes that jolt the frame. You can ease into moves, hold your line, and keep your subject centered like the skilled pilots you admire.
Try Cine or Tripod Mode should you want softer control inputs and smoother motion. Pair that with gentle stick pressure, and you’ll observe fewer sudden corrections. As you slow down, you join a smarter way to fly, one that makes your footage feel more polished, welcoming, and ready to share with dignity.
Handle Wind and Weather in Flight
Flying slowly helps a lot, yet wind and weather still shape how stable your footage looks once you’re in the air.
You feel more in control once you treat the sky like a teammate, not a challenge. Check forecasts before takeoff, and watch for sudden weather changes that can push your drone off line. Should wind gusts pick up, lower your altitude, shorten your moves, and let your 3-axis gimbal and GPS hold support you.
- Trust calm mornings whenever the air feels kinder.
- Stay alert so surprise gusts don’t shake your confidence.
- Fly in Cine Mode whenever you want smoother, gentler motion.
- Keep turns wide so your footage feels natural and shared.
- Land sooner should clouds build fast and your instincts whisper caution.
That’s how you protect both your shot and your peace.
Fix Shaky Drone Footage in Post
Even once wind or quick control inputs sneak a little shake into your clip, you can still rescue the footage in post with the right mix of stabilization tools and smart edits.
Start from trimming the worst jolts, then apply warp stabilization or your editor’s built in smoothing. Suppose your drone recorded at 60fps, slow the shot slightly to hide micro shakes and keep motion natural.
Next, lean on Horizon Steady or manual horizon correction to level drifting frames. Crop carefully, because stabilization needs room to work. Then use footage repair tools to reduce rolling shutter, fix wobble, and clean up vibration.
After that, match shots with gentle color grading so the sequence feels unified and cinematic. Upon clips this way, your footage fits right in with the smooth, confident work every pilot community loves.
Frequently Asked Questions
How Often Should I Calibrate My Drone Gimbal and IMU?
Calibrate your drone gimbal and IMU every few weeks, before important flights, and any time the drone has crashed, received a firmware update, or been exposed to major temperature changes. This helps correct sensor drift early and keeps flight performance and video stability consistent.
Can Propeller Condition Affect Camera Stability and Video Smoothness?
Yes, propeller condition has a direct impact on camera stability and video smoothness. If you overlook propeller balance or fly with damaged blades, vibrations can build up beyond what the damping system can absorb, leading to shakier footage and less predictable flight performance.
Do Indoor Flights Need Different Stabilization Settings Than Outdoor Flights?
Yes. For indoor flights, use vision sensors and softer stabilization because movement tends to be tighter and more controlled. For outdoor flights, use wind compensation, GPS hold, and a 3 axis gimbal to keep footage steady in changing air conditions.
Is a 3-Axis Gimbal Worth It for Beginner Drone Pilots?
Yes. A 3 axis gimbal gives you steadier footage, keeps the camera level in light wind, and makes your videos look cleaner from the start. For a beginner, it can make flying footage easier to use and more enjoyable to share.
How Does Payload Weight Impact Drone Camera Stabilization Performance?
Payload weight influences camera stabilization by shifting the drone’s center of gravity and increasing the workload on the gimbal motors. Footage stays more stable when the load is properly balanced, kept within the recommended range, and suited to the drone’s design.