Poor gaming headset mic quality usually comes from a few common issues: bad mic placement, low input volume, noisy settings, or background sound. Most voice problems get better with a quick mic adjustment and a few device setting changes. Crackling, muffled audio, and quiet volume can often be fixed without buying new gear. This guide shows the simple tweaks that help your voice sound clearer in chat and game comms.
Identify What Hurts Headset Mic Quality
Why does a headset mic sound bad even though the headset itself seems fine? You’re not alone when your voice sounds thin, harsh, or distant in chat.
Often, the problem starts around you, not on you. An echoey room bounces your words back into the mic, so friends hear reverb instead of clear speech.
Then your software can make things worse. If you’re using old drivers, Windows might handle your mic poorly, add glitches, or lock you into weak settings.
Hardware issues matter too. A loose dongle, wireless interference, or a worn cable can add hiss, crackle, and dropouts.
At the same time, bad gain settings can push your voice into distortion or bury it under noise. When you spot these causes sooner, you give your team a voice they can trust every match.
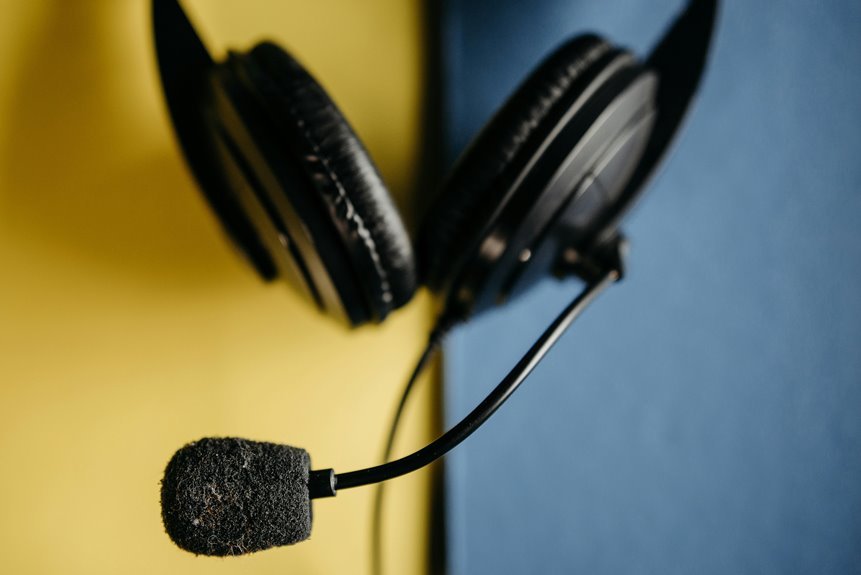
Place Your Headset Mic the Right Way
Even though your headset mic is decent, it won’t sound right until you place it correctly. Start by turning the microphone hole so it faces your mouth, not your cheek. That small move helps your voice sound clearer and more natural, so your team hears you the way you want to be heard.
Next, check your mic angle and mouth distance. Keep the mic close enough to catch your voice well, but not so close that breathing and popping sounds take over. A steady position matters too, because changing distance can make your volume jump around during chats.
Should your boom rotate, line it up with your mouth opening and leave it there. Then do a quick voice test while you speak normally. With the right placement, you’ll sound more present, confident, and easy for everyone to understand.
Adjust Your Headset Mic Input Level
Once your mic sits in the right spot, the next step is setting the input level so your voice comes through strong without sounding harsh. Consider this as input level calibration that helps your team hear the real you, not static, hiss, or distortion.
Begin speaking at your normal game volume, then a little louder, while watching your input meter. You want healthy movement, not peaks that slam the top. As you learn gain staging basics, aim for louder moments around -10 to -12 dB and keep the meter in the green zone.
Should your voice crack, clip, or sound sharp, pull the level back slightly. Also, check your headphones before raising gain so you don’t mistake loud monitoring for weak capture. Small changes here can make you sound clear, steady, and confidently present.
Fix Windows, Discord, and Game Settings
If your mic still sounds off after setting the input level, your software might be the real problem.
You should check Windows input settings initially, then tweak Discord voice options, and after that review your in-game audio settings so your voice comes through clearly.
These small fixes can make a big difference, and you don’t need fancy gear to hear it.
Windows Input Settings
Before you blame the headset, check Windows first, because one wrong input setting can make a good mic sound thin, quiet, or full of noise. Open Sound settings, choose your headset as the default recording device, then confirm it again in the Control Panel. That keeps your voice on the right path.
| Setting | What you do | Why it helps |
|---|---|---|
| Input device | Pick your headset mic | Stops Windows from using the wrong mic |
| Levels | Raise input carefully | Keeps speech clear without clipping |
| Advanced tab | Use highest sample rate selection | Adds cleaner detail and presence |
| Test mic | Speak and watch meter | Helps you catch weak or noisy input |
After that, update drivers in Device Manager and retest. You want your setup to feel dependable, like your squad hears the real you every time.
Discord Voice Tweaks
Even after Windows looks correct, Discord and your game can still change how your mic sounds, so this is where you tighten everything up. In Discord, choose the exact input device instead of Default, then confirm your Discord voice routing matches your headset mic. Turn off automatic input sensitivity whenever it keeps chopping your words, and set the slider so your normal voice stays clear.
Next, disable extra processing you don’t need, like aggressive noise reduction that can make you sound thin or robotic. Keep Echo Cancellation only whenever your room really needs it.
Then check Discord server permissions, because some servers limit voice activity or push-to-talk behavior. Make sure your game’s voice chat isn’t grabbing the wrong mic in the background. Whenever everything matches, your friends hear the real you, not a muffled version.
In-Game Audio Options
Once Discord sounds right, your game becomes the next place where mic quality can quietly fall apart. Should teammates still miss your callouts, check Windows initially, then your game. Set your headset mic as the default recording device, use the highest sample rate, and test input so your voice stays present and clean.
- Lower music and effects so game chat balance gives voices room to breathe.
- Turn off surround audio modes if they make footsteps huge but speech muddy or distant.
- Match your game input device to the same mic you picked in Windows and Discord.
These small fixes help your squad hear the real you, not static, clipping, or buried words. Once your settings line up, your voice feels steady, clear, and trusted in every match with your team.
Cut Background Noise Around Your Mic
Often, the biggest drop in mic quality doesn’t come from your voice at all, because background noise slips in and makes everything sound thin, messy, or far away.
You can fix a lot of that by changing the space around you. Start with room reflection control. Soft items like curtains, rugs, wall hangings, and a couch help stop echo before it reaches your mic.
Next, cut desk surface noise that travels up through your setup. Move the mic away from keyboard impact, mouse clicks, controller taps, and fans. Keep drinks, chargers, and rattling accessories off the desk when you play. If your headset cable rubs against your shirt, secure it so it stays still. Small changes make your voice feel closer, cleaner, and more present, which helps your team hear the real you.
Use Noise Suppression Without Losing Clarity
While background control helps at the source, noise suppression cleans up what still slips through, and the trick is to use just enough so your voice stays natural. If you push it too hard, your teammates may hear pumping, dull tone, or speech artifacts instead of the real you. Good room acoustics still matter, because cleaner input lets suppression work more gently and sound more like your normal voice.
- Start with light suppression in Voicemeeter Banana or RTX Voice, then raise it only until fans, typing, and hum fade.
- Add a compressor with careful settings so quiet words stay present, but breaths and clicks don’t jump forward.
- Listen for lost consonants, watery edges, or chopped syllables. Those signs mean you’ve gone too far, and your squad deserves better from you.
Test Your Headset Mic the Right Way
Before you change more settings, test your headset mic in a simple, repeatable way so you can hear what your friends actually hear. Pick one quiet spot, keep the mic in the same place, and speak at your normal game volume. That gives you a fair baseline.
Next, focus on testing microphone clarity by recording voice samples in the same app you use for chat, plus one local recorder. Say a few short lines, laugh once, and count to ten. Then listen back with headphones. Check whether your voice sounds even, present, and easy to understand.
After that, watch your input meter while you speak so your level stays steady. Whether you test the same way each time, you’ll make changes with confidence and sound more like part of the team.
Fix Muffled or Crackly Mic Audio
When your headset mic sounds muffled or crackly, start with the fixes that change your voice the most with the least effort. You want your squad to hear the real you, not static and blur. Most muffled audio fixes begin with placement, settings, and interference control.
- Rotate the mic so the opening faces your mouth, then keep a steady distance while you talk.
- Check Windows audio settings, set the mic as default, update drivers, and choose the highest sample rate available.
- Cut harsh highs with light EQ, use noise suppression, and switch to a wired dongle if wireless interference adds crackling distortion causes.
These steps clean up rough sound fast, help your callouts land clearly, and make you feel more connected whenever the team relies on your voice most.
Make Your Headset Mic Louder
Because a quiet mic can make even clear callouts disappear, the fastest way to make your headset mic louder is to improve placement first, then raise input levels with control.
Move the mic so the opening faces your mouth, rotate it into line, and keep it close without touching your lips. That alone often helps your squad hear you better.
Next, open your sound control panel and raise the microphone level until your input meter stays in the green zone.
Should your voice still sound low, try mic boost settings carefully, then test your loudest words and back off should clipping start.
After that, do a volume limiter check so your headset output isn’t fooling you into overcompensating. Small changes work best, and you’ll sound present, steady, and easier for teammates to trust.
Improve Mic Sound With Software and Accessories
You can clean up your headset mic fast with the right software, smart EQ and gain settings, and simple add-ons like pop filters or windscreens.
These tools help you cut background noise, tame harsh sounds, and keep your voice clear and steady.
Once your mic is loud enough, this is how you make it sound cleaner, smoother, and more natural.
Noise Reduction Tools
A few smart noise reduction tools can make your headset mic sound much cleaner, even in a busy room. When your squad hears you clearly, you feel more connected and confident right away.
- Turn on RTX Voice filtering if your GPU supports it. It cuts keyboard taps, fan hum, and room noise, so your voice stays front and center.
- Set a Voicemeeter noise gate to block soft background sounds when you’re not speaking. Then add light compression to keep your volume steady without sounding harsh.
- Test your settings during chat, not just in menus. Ask friends how you sound, lower sensitivity if noise slips through, and save a preset that fits your space.
With the right tools, you don’t have to sound perfect. You just sound clear, present, and part of the team.
Pop Filters And Windscreens
Smart software can clean up a noisy signal, but pop filters and windscreens fix the problem before it reaches your mic. Whenever you want your squad to hear you clearly, these small accessories make a real difference. Pop filter basics are simple: a thin barrier softens bursts from P and B sounds, so your voice stays smooth instead of spiky.
Windscreens help next with adding wind protection against breath noise, quick exhale blasts, and light room airflow. On a gaming headset, a foam cover is the easiest option because it fits close and feels natural during long sessions.
You don’t need fancy gear to sound more polished. You just need a setup that supports you, helps you speak with confidence, and lets your team hear the real you every match, every call.
EQ And Gain Settings
Once your mic is blocking pops and breath noise better, EQ and gain settings help shape that cleaner signal into a voice that sounds fuller, clearer, and easier to understand.
With a few smart tweaks, you’ll sound more natural and more connected to your team.
- Set gain first. Aim for strong peaks around -10 to -12 dB, and keep your meter in the green. That protects active range and stops clipping.
- Use EQ to trim harsh highs from 10kHz to 20kHz, then gently dip rough mids with a Q around 1.8. This enhances vocal presence without making you sound thin.
- Test while gaming. Listen in headphones, adjust in small steps, and save presets in tools like Voicemeeter. As soon as your voice sits right in the mix, everyone hears you clearly and confidently.
Know When to Replace Your Headset Mic
When should you replace your headset mic instead of trying to fix it again? If your friends still hear static, dropouts, or muffled speech after you adjust position, gain, drivers, and noise tools, it’s time. You deserve clear comms that help you feel part of the squad, not the weak link. So, replace worn hardware when the boom is loose, the cable crackles, or the mic cuts out during simple tests. And if your headset is several years old, upgrade aging mic parts before big matches.
| Sign | What you should do |
|---|---|
| Crackling cable | Replace headset |
| Loose boom arm | Replace mic unit |
| Muffled voice always | Test, then replace |
| Driver updates fail | Replace worn hardware |
| Old design, weak clarity | Upgrade aging mic |
Frequently Asked Questions
Can a Gaming Headset Mic Sound Good on Console Without Extra Software?
Yes, a gaming headset mic can sound good on console. Place the mic close to the corner of your mouth, not directly in front of it, and adjust the console chat and input levels so your voice stays clear without distortion. With the right position and balanced settings, your teammates will hear you cleanly.
Do USB and 3.5mm Headset Mics Differ in Voice Quality?
Yes, there is often a noticeable difference. USB headset mics usually sound cleaner and more consistent because they use their own built in audio processing. 3.5mm headset mics rely on your device’s analog audio hardware, so sound quality can vary based on the microphone input and impedance support. A direct side by side test will give you the clearest answer.
How Long Should a Gaming Headset Mic Typically Last?
A gaming headset mic usually lasts 2 to 5 years, which often lines up with when many players replace their gear. It tends to wear out faster with constant use, careless storage, sweat buildup, or stress on the cable.
Are Detachable Headset Microphones Better Than Built-In Boom Mics?
Detachable headset microphones usually offer more flexibility, while built in boom mics often provide a steadier connection. Consider mic durability, day to day convenience, and how easy it is to replace parts so your setup stays reliable and ready for group use.
Does Internet Connection Affect How My Headset Mic Sounds to Others?
Yes, your internet connection can change how your headset mic sounds to other people. A steady connection keeps your voice clear, while a weak or unstable one can cause cutouts, robotic audio, delay, or missing words. With a more reliable network, your voice reaches others more smoothly and consistently.