Yes, 100% disk usage on Windows can usually be fixed. The cause is often a busy background service, too many startup apps, outdated drivers, or a drive problem. A few quick checks can show what is using the disk and point you to the right fix. This guide walks through simple steps to speed things up and get your PC responsive again.
What 100% Disk Usage Means
A 100% disk usage reading means your drive is fully busy handling read and write requests, not that your storage space is full. In other words, your PC feels stuck because the drive can’t keep up. That’s one of the key disk activity basics you should know.
As your system, apps, and background tasks all ask the drive for attention at once, everything waits its turn, and you feel the slowdown.
That leads to clear disk utilization symptoms you can recognize. You may notice long boot times, lag when opening apps, freezing, or a mouse pointer that stutters like it forgot the dance steps.
Even a strong computer can feel left behind as the drive is overloaded. Understanding what this reading means helps you feel more confident and less alone as your system starts acting frustratingly slow.
Common Causes of 100% Disk Usage
You’ll often find that 100% disk usage starts as too many background services fight for drive access at the same time.
You should also watch for a failing hard drive, because damaged hardware can keep your system busy with constant read and write errors.
On top of that, malware and bloated software can quietly hammer your disk, making your PC feel slow, stuck, and frustrating to use.
Background Service Overload
When background services pile up, your drive can hit 100% usage even though you aren’t doing much at all. You’re not imagining it. Windows often runs many tasks behind the scenes, and together they can flood your storage with nonstop read and write requests.
That’s where service overload effects start showing up. Your apps open slowly, your system stalls, and even simple clicks feel delayed.
In many cases, background process conflicts make things worse, especially whenever antivirus scans, indexing, updates, and SysMain all compete at once. You can check this in Task Manager and spot which services are causing the traffic. Once you see the pattern, you’re back in control.
And honestly, that matters, because nobody wants to feel stuck waiting on a computer that should be keeping up with the rest of your day.
Failing Drive Hardware
Even though no app looks busy, a failing hard drive can keep your disk stuck at 100% because Windows keeps retrying slow or damaged read and write requests. That means your whole PC can feel frozen, and it’s not your fault. You’re handling wear, not weakness.
As the damage grows, you might hear clicking, notice long boot times, or see files take forever to open. Those are significant drive replacement signs. To check what’s happening, run hardware failure diagnostics, review SMART status, and scan for bad sectors with CHKDSK.
Whenever errors keep showing up, back up your files right away. Then test with another drive whenever you can. That step helps your community of devices, and you, confirm the problem is physical, not just a stubborn Windows slowdown today.
Malware And Bloatware
Although hardware trouble can keep a drive pinned at 100%, malware and bloatware often create the same miserable slowdown through flooding your system with concealed scans, background installs, startup tasks, and nonstop read and write requests.
That overlap matters, because a sick drive and a bloated system can feel identical. You can spot the difference in Task Manager, where unknown processes, constant installer activity, and heavy startup apps often reveal malware persistence or factory-loaded junk.
Should you notice random services reopening after you close them, your PC may be fighting to stay clean. Start with a trusted security scan, then remove unnecessary trial apps, launchers, and update helpers.
This bloatware cleanup lightens disk traffic, reduces thrashing, and helps your computer feel like yours again, not something crowded with unwanted guests or lurkers.
Check What’s Using the Disk
Why guess what’s causing the slowdown while Windows can show you the answer in seconds? Open Task Manager with Ctrl+Shift+Esc, then watch the Task Manager disk column on the Processes tab. You’ll quickly see which apps or services are flooding your drive. That matters because disk usage means activity, not storage space, and too much activity can make your whole PC feel stuck.
Next, go a step deeper with a resource monitor process check so you can spot patterns and feel more in control.
- Sort Disk by highest usage initially
- Watch antivirus, Search, or SysMain activity
- Compare disk spikes with high memory use
- Observe whether one app keeps returning to the top
You’re not alone here. Once you see the real culprit, fixing the right problem feels far less overwhelming and much more doable.
Restart Your PC First
Before you try deeper fixes, restart your PC and see whether the disk usage drops.
A simple reboot can clear temporary glitches, stop stuck background tasks, and give Windows a clean start.
It’s quick, safe, and often fixes the problem before you need anything more.
Simple Reboot Check
Should your disk usage suddenly sticks at 100%, start with the simplest fix and restart your PC first. A reboot gives your system a clean slate and helps you see whether the spike was just a one-time hiccup.
Consider it as a quick reboot diagnostic that your whole Windows community can trust because it takes only a minute and often saves stress.
- Save your work, then restart normally
- Wait for Windows to fully load before opening apps
- Check whether your PC feels smoother right away
- Use Task Manager for a simple restart confirmation
In the event disk activity drops after startup, you’ve learned something significant without changing settings.
In the event it stays pinned, don’t panic. You’re still on the right path, and this initial check helps you move forward with confidence, together as a troubleshooting team.
Clear Temporary Glitches
A quick restart is the best next step whenever disk usage suddenly locks at 100%, because it clears small system glitches, stops stuck background tasks, and gives Windows a fresh start without changing anything essential. Whenever your PC feels frozen, you’re not alone. Restarting often fixes cache refresh issues and transient system hiccups before deeper troubleshooting.
| What restarts fix | Why it helps | What you do |
|---|---|---|
| Stuck apps | Ends concealed disk activity | Save work |
| Hung services | Resets busy processes | Click Restart |
| Memory pressure | Lowers paging load | Wait fully |
| Cache refresh issues | Rebuilds temp data | Sign back in |
After rebooting, open Task Manager and check Disk again. Whenever usage drops, your system likely hit a temporary snag, not a serious failure. That’s a reassuring win for everyone.
Disable SysMain to Reduce Disk Usage
When your disk stays stuck at 100%, SysMain is one of the initial services you should check, because it can keep reading and writing data in the background even while you’re not doing much. If your PC feels frozen, you’re not alone. SysMain tries to speed up app loading, but on some systems, especially older drives, its legacy caching creates nonstop activity. That makes service optimization worth trying right away.
- Press Windows + R, type `services.msc`, and hit Enter.
- Find SysMain, double-click it, then click Stop.
- Set Startup type to Disabled so it stays off.
- Open Task Manager and watch disk usage drop in real time.
This step helps many people in the same boat as you. If your computer finally breathes again, that’s a strong sign SysMain was the culprit.
Turn Off Windows Search Indexing
If disabling SysMain didn’t fully calm the drive, the next place to check is Windows Search indexing. This feature helps you find files faster, but its search indexing impact can keep your drive busy, especially on older PCs. You’re not alone when your system feels stuck doing invisible work.
To turn it off, press Windows + R, type services.msc, and press Enter. Scroll to Windows Search, right-click it, choose Properties, then set Startup type to Disabled and click Stop. These indexing service settings prevent Windows from constantly scanning and updating file lists.
You can also open File Explorer, right-click a drive, choose Properties, and clear Allow files on this drive to have contents indexed. That small change often gives your computer room to breathe again and feel more like yours.
Scan for Malware and Background Apps
If your disk usage still spikes, malware or too many background apps might be the concealed cause. You should run a full malware scan to catch harmful processes that keep hitting your drive without warning.
Then check which apps are running in the background, because turning off the ones you don’t need can quickly ease the load.
Run Malware Scan
Because concealed malware and runaway background apps can hammer your drive nonstop, a full malware scan is one of the smartest next steps whenever Task Manager shows 100% disk usage and you can’t clearly spot the cause. You’re not overreacting. Hidden threats often read, write, and call home constantly, which keeps disk activity pinned.
- Open Windows Security and run a Full Scan, not a quick one.
- Watch for suspicious files, repeated alerts, or strange app names.
- Use malware quarantine right away so infected items stop running.
- If threats appear, complete virus removal, then restart and recheck disk usage.
This step helps you feel back in control. If your PC has been freezing, clicking loudly, or taking forever to open files, malware may be behind it.
A clean scan gives your whole setup a fair reset.
Disable Background Apps
Start with trimming background apps that quietly chew through your drive all day. Even trusted apps can sync, update, and cache files nonstop, which pushes disk activity to 100% and makes your PC feel left behind. Open Settings, go to Privacy, then review background app permissions so only the apps you truly use can run behind the scenes.
Next, connect this cleanup to startup control. Open Task Manager, check the Startup tab, and disable apps you don’t need at launch. Fewer startup tasks mean fewer concealed read and write requests after sign in.
Should your version of Windows offer startup app background limits, use them to keep chat tools, game launchers, and store apps from piling onto the drive. You deserve a system that keeps up with you, not one that pants like it ran upstairs.
Run CHKDSK to Fix Disk Errors
While 100% disk usage often looks like a Windows glitch, hard drive errors can quietly keep your system busy and painfully slow, so running CHKDSK is a smart next step.
Open Command Prompt as admin, type `chkdsk /r`, and let Windows schedule the scan if needed. This tool checks the file system, performs a drive surface scan, and runs sector repair checks that can stop concealed errors from dragging your PC down.
- You may find bad sectors that keep forcing repeated reads.
- You can catch file system mistakes that create constant disk activity.
- You might need a restart, so save your work first.
- You should back up important files if the drive seems unstable.
If your computer has felt stuck and lonely lately, you’re not imagining it. CHKDSK helps your system get back in step with you.
Repair Windows With SFC and DISM
| Tool | What you run | What you might see |
|---|---|---|
| SFC | sfc /scannow | Missing files restored |
| DISM | DISM /Online /Cleanup-Image /RestoreHealth | Windows image repaired |
| Timing | Run SFC, then DISM, then SFC again | Cleaner, steadier performance |
Stay patient while scans finish. Your PC might seem quiet, then suddenly busy. That’s normal. In moments like this, you’re giving Windows a fresh chance to breathe and rejoin the smooth, reliable rhythm you expect every day.
Update Storage and AHCI Drivers
Provided as requested:
If disk usage still spikes after repair scans, your storage and AHCI drivers deserve a close look because they control how Windows talks to the drive every second. When these drivers are outdated, Windows can stumble, queue requests badly, and keep your whole system waiting. You’re not alone here, and this fix often helps.
- Open Device Manager and expand IDE ATA/ATAPI controllers or Storage controllers.
- Update the AHCI or SATA controller driver from your PC maker first.
- Check chipset downloads too, since driver compatibility matters across the whole storage path.
- Look for controller firmware updates on the laptop or motherboard support page.
After that, restart and test disk activity in Task Manager.
If Windows installed a generic StorAHCI driver, switching to the vendor version can smooth communication and reduce constant drive chatter.
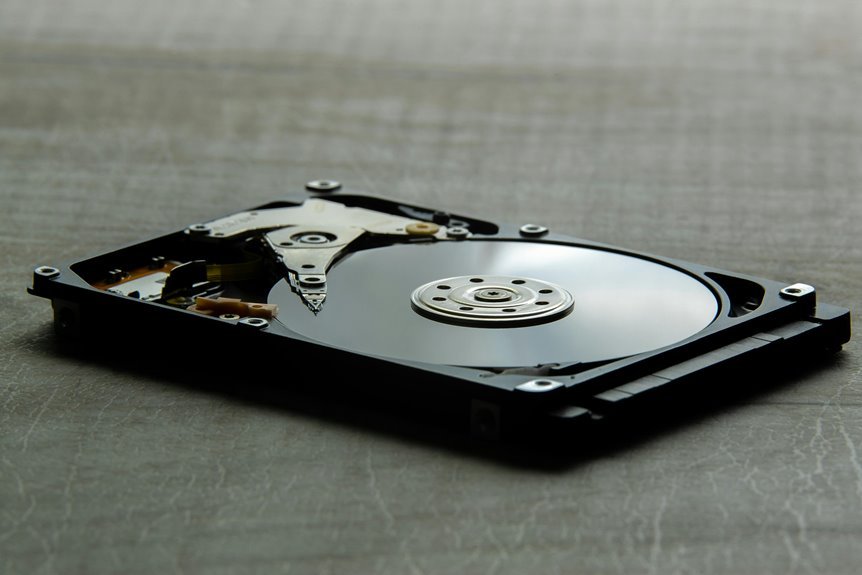
Check Hard Drive Health
Should driver updates didn’t calm things down, the next step is to check your hard drive’s health because a worn or failing drive can keep Windows stuck at 100% disk usage no matter what else you try. Start by backing up important files, just in case. Then run Windows Error Checking or CHKDSK to look for file system problems and bad sectors.
Next, use your drive maker’s drive diagnostics tool to read SMART data and spot warning signs upfront. If the report shows reallocated sectors, read errors, or slow response times, your drive might be struggling.
After that, run a disk surface scan to check for physical damage across the platter. These tests help you rule out concealed hardware trouble, so you’re not guessing alone. You’re taking smart, steady steps to protect your system and your files.
Upgrade to an SSD if Needed
When software fixes only bring short relief, upgrading to an SSD often changes the whole experience because it removes the biggest speed limit in many Windows PCs. Provided that your hard drive keeps thrashing, you don’t need to feel stuck. You’re not by yourself, and this upgrade helps many people rejoin the smooth, fast Windows experience they expect.
- Apps open faster, and boot times drop sharply.
- Windows updates feel less painful and less disruptive.
- Heavy multitasking causes fewer freezes and long waits.
- Older PCs often feel surprisingly modern again.
That matters because SSD performance benefits go far beyond raw speed. You get quicker response, less noise, and fewer slowdowns when programs compete for storage access.
As you start storage upgrade planning, check your laptop or desktop size, connection type, and cloning options before. Then you can upgrade with confidence.
Frequently Asked Questions
Can Too Little RAM Cause 100% Disk Usage?
Yes. When RAM runs short, the system pushes data to the drive more often, which can drive disk usage to 100 percent. The result is stuttering, freezes, and slow response times. Adding more memory can cut down on paging and reduce constant disk activity.
Should I Change Virtual Memory Settings for High Disk Usage?
If heavy paging is causing the disk to stay busy, changing virtual memory settings can help. First, check whether RAM is running low. Then set the page file back to system managed so Windows can size it properly. This often cuts down on constant paging and makes the system respond more smoothly.
Does the Power Plan Affect Disk Usage in Windows?
Yes, your power settings can affect disk activity. They can slow a drive, put it into sleep mode, and add delay when it starts working again. In many cases, the High Performance plan reduces these pauses and can make disk access feel more responsive.
Will Disabling Startup Apps Reduce Disk Usage at Boot?
Yes, disabling startup apps can reduce disk usage during boot because fewer programs and services begin reading from and writing to the drive at the same time. This can shorten sign in delays and improve system responsiveness while Windows finishes loading.
Is Resetting Windows Worth Trying for Persistent 100% Disk Usage?
Resetting Windows is worth trying, but it is not a guaranteed fix. Try System Restore first, make a backup of your files, and check the drive for hardware failure. Ongoing 100 percent disk usage often comes back when the drive is starting to fail.